The Mysteries of Elden Ring’s Great Runes

The Mysteries of Elden Ring’s Great Runes

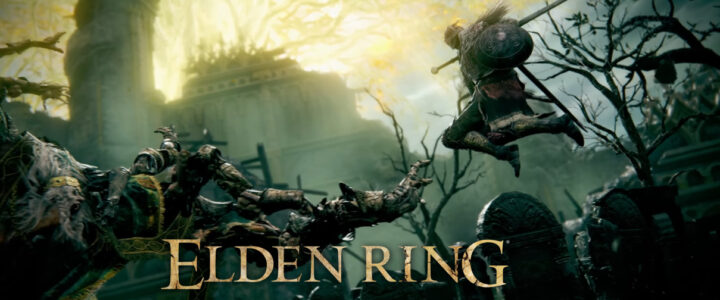
In the enigmatic world of Elden Ring, where every corner harbors secrets and every step is fraught with danger, the pursuit of power is paramount. Among the myriad of treasures and artifacts that litter the land, none are as coveted or as shrouded in mystery as the Great Runes. These arcane relics said to be fragments of the Elden Ring itself, hold immense power and significance within the lore of the game. But what exactly are Great Runes, and how does one unlock their potent abilities?

What are Great Runes?

Great Runes stand as the elusive rewards awaiting those brave enough to conquer the final bosses of Elden Ring’s main dungeons. In the rich tapestry of Elden Ring’s lore, they are fragments of the eponymous Elden Ring, each possessing unique properties and abilities. These coveted artifacts number six in total, with Godric’s Great Rune being the first encountered upon completing the daunting challenge of Stormveil Castle.

From a gameplay perspective, Great Runes serve a dual purpose. Firstly, they grant access to the final area of the game, a privilege reserved only for those who possess at least two of these potent artifacts. Secondly, they bestow formidable buffs upon the player’s character, enhancing their abilities and augmenting their combat prowess. However, unlocking the true potential of these artifacts requires more than just possession; it also requires more resources, such as Buying Elden Ring Runes; it demands a journey fraught with peril and discovery.

How to Awaken Great Runes

The path to unlocking the power of Great Runes is shrouded in secrecy, with the game offering little guidance to the uninitiated. However, for those willing to delve deeper, a series of steps must be undertaken to awaken these dormant relics.

Acquire a Great Rune: The first step on the journey to awakening Great Runes is to obtain one of these elusive artifacts. Following the main path of Elden Ring will eventually lead players to their first encounter with a Great Rune upon the conquest of Stormveil Castle.

Locate the Divine Tower: Nestled amidst the rugged landscape not far from Stormveil Castle lies the Divine Tower, a pivotal location in the awakening of Great Runes. To reach this sacred site, one must traverse the long, broken bridge extending northeast from the castle.

Open Stormveil Castle's Front Gate: Before embarking on the journey to the Divine Tower, players must ensure that the front gate of Stormveil Castle has been unbarred, granting access to the bridge beyond.

Survive the Bridge Crossing: The path to the Divine Tower is fraught with peril, as players must contend with the formidable Guardian Golems that stand sentinel along the bridge's length. Whether by blade or by foot, the crossing must be made to reach the tower's sanctum.

Reach the Teleporter: At the edge of the bridge, a teleporter awaits, transporting weary travelers to the other side where a Site of Grace offers respite amidst the turmoil.

Ascend the Tower: Within the confines of the Divine Tower, a series of shrines and altars encircle a massive bone, the focal point of the awakening ritual. Here, players must use the Great Rune in conjunction with the altar to finally activate its dormant power.

How to Use Great Runes

With the Great Rune awakened, players can harness its formidable power to enhance their abilities and turn the tide of battle in their favor. However, unlocking the full potential of these artifacts requires additional steps.

Visit a Site of Grace: After activating the Great Rune, players must seek solace at a Site of Grace to access their inventory and equip the artifact.

Equip the Great Rune: Within the inventory menu, players can select the Great Runes option and equip their chosen artifact into the designated slot.

Use a Rune Arc: Merely equipping the Great Rune is insufficient to unlock its potent abilities. Players must also expend a rare and valuable Elden Ring items known as a Rune Arc, which catalyzes invoking the artifact's power. These precious items can be acquired from select merchants or found as rare drops throughout the world.

Reap the Benefits: Once activated, the Great Rune bestows its powerful buffs upon the player, enhancing their capabilities and granting them an edge in combat. However, these benefits are not permanent and will dissipate upon death, requiring the expenditure of another Rune Arc to reclaim their potency.

Unlocking the Final Area: In addition to their benefits, possessing at least two Awakened Great Runes is essential for unlocking the final area of the game. Without these artifacts, the path to this enigmatic locale remains sealed, leaving players to unravel the mystery of their significance.

In the sprawling world of Elden Ring, the journey to unlock the power of Great Runes is fraught with peril and discovery. From the treacherous depths of ancient dungeons to the towering spires of forgotten towers, the path to enlightenment is paved with challenges both great and small. Yet for those bold enough to undertake the quest, the rewards are beyond measure, for within the heart of these arcane relics lies the key to unlocking the true potential of the Elden Ring itself.

Skull and Bones: Fireworks and Friendship on the High Seas

Skull and Bones: Fireworks and Friendship on the High Seas

In the vast expanse of the open sea, where communication is limited to gestures and actions, there exists an unspoken code among sailors. It’s a code that transcends language barriers and fosters camaraderie in the most unexpected of encounters. At the heart of this code lies a simple yet powerful symbol: fireworks.

For many seafarers, myself included, fireworks serve as a beacon of goodwill, a signal to others that we come in peace. Whenever I spot fellow players navigating the waves, I make it a point to illuminate the sky with bursts of light, a silent proclamation of friendship. And more often than not, this gesture is reciprocated—a testament to the mutual understanding that exists among sailors.

One particular instance stands out vividly in my mind. As I departed from a bustling port, my eyes caught sight of a fellow player’s ship, its hull battered and its health dwindling dangerously low. Pursuing it were several relentless AI vessels, hungry for destruction. Without hesitation, I sprang into action, steering my own ship into the fray. With a resounding crash, I intercepted the attackers, providing cover for my fellow sailor to escape to safety. In the aftermath, as they found refuge in the port, the night sky lit up with a symphony of fireworks—a silent exchange of gratitude and solidarity.

Yet, amidst these moments of camaraderie, a longing for more direct communication lingers. While tools like the PS5 app and Discord bridge the gap between friends, they remain inadequate for interactions with strangers on the high seas. It’s a dilemma faced by many casual players who prefer seamless in-game communication. Nevertheless, we press on, cherishing the simplicity and beauty of our silent bond forged through fireworks.

Each firework carries its own subtle message, its own hidden meaning. For some, like myself, the mermaid symbolizes a friendly greeting—a simple “hello” amidst the vastness of the ocean. Yet, in the heat of battle, the crossed swords take on a different significance, a warning to adversaries that conflict is imminent. It’s a delicate dance of interpretation, where miscommunication can lead to unintended confrontations.

Amidst the variety of fireworks available, one stands out as a beacon of peace: the clash of beers. Its jovial connotations make it the ideal choice for signaling friendship and cooperation. However, acquiring such specialized fireworks isn’t always straightforward, leaving many sailors to rely on more accessible options.

In the midst of peril, a white flag—a universal symbol of surrender—would be a welcome addition to our arsenal of signals. Such was the case in a recent encounter during a Cutthroat Hunt. Mistakenly believing myself to be alone in the battle, I found unexpected assistance in the eleventh hour. Yet, as I attempted to convey my surrender by jettisoning the map, my intentions were misinterpreted, and the skirmish ensued. In hindsight, a simple firework signaling surrender could have averted the misunderstanding entirely.

As we navigate the unpredictable waters of online interactions, the language of fireworks remains a constant, a silent testament to the bonds forged among sailors. Whether it’s a fleeting alliance in the midst of chaos or a shared moment of respite in the calm, the brilliance of fireworks serves as a beacon of hope and unity on the high seas. Where is the best place to buy skull and bones items? MMoexp.com is your best choice. So, to all my fellow sailors, may your skies be alight with the glow of friendship, and may your voyages be filled with safe passage and serenity.

Last Epoch’s Top 5 Build Recommendations for Patch 1.0

Last Epoch’s Top 5 Build Recommendations for Patch 1.0

Hello, fellow Last Epoch enthusiasts! Today we’re diving deep into the heart of Last Epoch with my top five recommendations for Patch 1.0. Whether you’re a seasoned player looking for a new challenge or a newcomer seeking guidance, these builds are sure to ignite your passion for Last Epoch. So buckle up and let’s delve into the world of intricate builds and thrilling gameplay.

  1. Poison Wandering Spirits – Unleash the Lethal Fury:

• Dive into the world of poison-based Wandering Spirits, where every channel unleashes a torrent of toxic damage upon your foes.
• Harness the power of Ruin Warp to traverse the battlefield with unparalleled speed, leaving devastation in your wake.
• With significant buffs in Patch 1.0, this build becomes a force to be reckoned with, boasting enhanced survivability and devastating damage potential.
• Perfect for players seeking a challenging yet rewarding gameplay experience, Poison Wandering Spirits offers a unique blend of strategy and power.

  1. Cold Werebear – Embrace the Chill:

• Experience the sheer might of the Cold Werebear build, combining powerful damage over time effects with unmatched survivability.
• Traverse the icy landscapes as a formidable Werebear, unleashing freezing devastation upon your enemies with every swipe.
• While lacking in single-target damage, this build excels in clearing large groups of enemies with ease, making it a favorite among players who enjoy a more laid-back playstyle.
• Transition seamlessly from leveling with Thorn Totem Druid to unleashing the full potential of Cold Werebear in endgame content, ensuring a smooth progression throughout your journey.

  1. Blood Specters & Summon Abomination – Master the Minions:

• Delve into the realm of Necromancy with two potent minion-based builds, offering diverse playstyles and formidable allies on the battlefield.
• Raise an army of Blood Specters to unleash bleeding havoc upon your enemies, or command the mighty Summon Abomination to crush foes with brute force.
• Both builds offer accessible entry points for players of all levels, allowing for a seamless transition from leveling to endgame content.
• Whether you prefer the relentless onslaught of minions or the commanding presence of a powerful abomination, these builds provide endless possibilities for minion enthusiasts.

  1. Elemental Starfield Spark Charge Autobomber – Unleash the Elemental Fury:

• Harness the explosive power of the Elemental Starfield Spark Charge Autobomber, delivering devastating elemental damage with each detonation.
• Utilize Fragment of the Enigma to generate massive amounts of Ward, ensuring your survival amidst the chaos of battle.
• While requiring some Last Epoch gold investment to reach its full potential, this build offers unparalleled clear speed and damage output, making it a favorite among players who crave fast-paced action.
• Transition smoothly from other Rune Master builds to Elemental Starfield Spark Charge Autobomber, capitalizing on its unique mechanics to dominate the battlefield with ease.

  1. Warpath Void Knight – Embody the Unstoppable Force:

• Embrace the raw power of Warpath Void Knight, unleashing devastating cleaves upon your enemies with every rotation.
• Utilize Warpath to effortlessly mow down hordes of foes while wielding massive two-handed weapons for maximum damage potential.
• With minimal gear requirements and a straightforward playstyle, this build offers an accessible entry point for players looking to dive into Last Epoch’s endgame content.
• Transition seamlessly from leveling to endgame content with Warpath Void Knight, enjoying the thrill of unstoppable destruction at your fingertips.

Conclusion:

In conclusion, Patch 1.0 brings forth a plethora of exciting builds for players to explore and master in Last Epoch. Whether you prefer the strategic complexity of poison-based spells or the raw power of minion armies, there’s a build to suit every playstyle and preference. So gather your courage, sharpen your skills, and embark on an epic journey through the realms of Eterra with these top-tier build recommendations. Happy gaming, and may your adventures be filled with glory and triumph!

Mastering Protection Timers Guide in Myth of Empires

Mastering Protection Timers Guide in Myth of Empires

We delve deep into the intricate mechanics of Myth of Empires. Today, we’re tackling a question that has plagued many players: protection timers. Whether you’re a seasoned player or a newcomer, understanding how to set up these timers effectively can make a world of difference in your gameplay experience. So, grab your coffee and join me as we demystify protection timers in Myth of Empires.

Understanding the Basics:

Protection timers in Myth of Empires serve as a safeguard for your hard-earned resources and structures. They provide a window of immunity against attacks, allowing you to focus on building your empire without the constant fear of raids. However, setting up these timers requires careful planning and understanding of the game’s mechanics.

Boundary Marker Range:

Before diving into protection timers, it’s crucial to grasp the concept of the boundary marker range. This range is represented by a white boundary marker on the map, encompassing the area protected by your weekly tax protection time. Anything within this boundary is shielded from decay and attacks, providing a haven for your assets.

Setting Up Protection Timers:

Now, let’s get down to the nitty-gritty of setting up protection timers. The process may seem daunting at first, but fear not – I’m here to guide you through it step by step.

  1. Upgrading Guild Skills: Before setting your protection timer, consider upgrading the “Increasingly Dominant” skill in the guild skill tree. This skill extends the duration of your protection timer, allowing for greater flexibility in scheduling.
  2. Paying Taxes: To activate your protection timer, you’ll need to pay three different taxes: poll tax, head tax, and farm tax. These taxes require specific resources and Myth of Empires Copper coins, so ensure you have them ready before proceeding.
  3. Inputting Time Intervals: When setting your protection timer, keep in mind that the time intervals are determined by the server you’re playing on. Use the 24-hour clock format (0-24) to input your desired time intervals, avoiding the use of semicolons or other separators.
  4. Calculating Duration: As you input the time intervals, keep an eye on the duration displayed on the screen. This will indicate the total number of hours covered by your protection timer, allowing you to adjust as needed.
  5. Confirming Settings: Once you’ve inputted your desired time intervals, confirm your settings to activate the protection timer. Double-check your inputs to ensure accuracy and avoid any discrepancies.

Optimizing Protection Timers:

Now that you’ve mastered the basics of setting up protection timers, let’s explore some optimization strategies to maximize their effectiveness.

  1. Strategic Scheduling: Consider your daily routine and schedule protection timers accordingly. Whether you’re logging off for the night or heading out for work, aligning protection timers with your downtime can provide uninterrupted peace of mind.
  2. Guild Cooperation: Work with your guildmates to coordinate protection timers and share resources for tax payments. Pooling resources and coordinating schedules can streamline the process and ensure comprehensive coverage for your guild.
  3. Long-Term Planning: Invest in guild upgrades to enhance the duration and efficiency of protection timers. By prioritizing guild skills and resources, you can establish a robust defense strategy that withstands the test of time.

Conclusion:

In conclusion, protection timers play a pivotal role in safeguarding your assets and fortifying your empire in Myth of Empires. By mastering the intricacies of setting up these timers and implementing optimization strategies, you can create a secure environment for growth and prosperity. Remember, patience and strategic planning are key to mastering protection timers and conquering the challenges that lie ahead.

If you enjoyed this article, be sure to follow MMOexp to explore more ideas and building tips. Buy MoE Copper Coins from mmoexp.com! Safe and Fast, 24/7 online service.

Guide to Gold Skull Rum and Long Nines in Skull and Bones

Guide to Gold Skull Rum and Long Nines in Skull and Bones

In the treacherous waters of the pirate-infested Caribbean lies an adventure of epic proportions in Skull and Bones, where players navigate the high seas, engage in fierce naval battles, and seek out legendary treasures. As you progress through the game, you’ll encounter various challenges and opportunities to upgrade your ship, enhance your arsenal, and ultimately become a feared Kingpin of the seas. One of the key elements of reaching the pinnacle of power in Skull and Bones is acquiring Gold Skull Rum and the formidable Long Nines, which are essential for dominating the waves and asserting your dominance over rival pirates.

At the heart of Skull and Bones lies the Helm, where players can craft a myriad of powerful items using Pieces of Eight, the coveted endgame currency. Among these items are the legendary Long Nines, renowned for their devastating firepower and unrivaled performance in naval combat. With a staggering damage output of 2234, combined with attributes like Mast Breaker, Piercing Three, and Tearing Two, the Long Nines are a force to be reckoned with on the high seas. Whether you’re engaging enemy vessels or laying siege to fortified strongholds, equipping your ship with these formidable cannons ensures swift and decisive victories.

However, obtaining the Long Nines is no easy feat. To unlock access to these fearsome weapons, players must first achieve Kingpin infamy rank and complete the storyline associated with the enigmatic pirate lord, Scurlock. Once these prerequisites are met, players can ascend to Scurlock’s office atop the grand staircase and access the buy and sell tab. Here, amidst a trove of valuable treasures and rare commodities, players will find the elusive Long Nines available for purchase. Additionally, players can acquire a blueprint for Scurlock Chasers, further expanding their arsenal with potent weaponry.

Yet, acquiring the Long Nines requires more than just Pieces of Eight; it demands a substantial investment of Gold Skull Rum. This exclusive ingredient catalyzes crafting the most powerful items in Skull and Bones, including the coveted Long Nines. To obtain Gold Skull Rum, players must first refine White Skull Rum, a process that unlocks at Helm Empire Tier 7. By investing Pieces of Eight into upgrading Helm’s Empire Overview, players gradually unlock the ability to produce Gold Skull Rum from White Skull Rum at a 2:1 ratio. This means that for every two units of White Skull Rum refined, players yield one unit of Gold Skull Rum, paving the way for crafting the legendary Long Nines.

To embark on the journey towards acquiring Gold Skull Rum, players must gather a substantial amount of White Skull Rum. With diligent effort and strategic planning, players can amass the required resources and embark on the refinement process. Once the refinement facility is operational, players can convert their stockpile of White Skull Rum into Gold Skull Rum, unlocking access to the pinnacle of naval firepower: the Long Nines.

In summary, mastering the intricacies of Skull and Bones’ endgame content requires strategic prowess, resource management, and a relentless pursuit of power. By ascending to Kingpin infamy rank, completing Scurlock’s storyline, and investing in the refinement of White Skull Rum, players can unlock the formidable Long Nines and cement their status as legends of the sea. With unparalleled firepower at their disposal, players can navigate the treacherous waters of the Caribbean with confidence, leaving a trail of defeated foes and plundered riches in their wake.

For more of the latest Skull and Bones content here. If and buy Skull and Bones Silver through our website, you will get more discounts.