

Throne and Liberty: How to Server Transfer – A Complete Guide

Throne and Liberty: How to Server Transfer – A Complete Guide

In the expansive world of Throne and Liberty, players have the opportunity to explore vast landscapes, engage in intense PvP battles, complete quests, and level up their characters. However, sometimes the server you initially join may not be the best fit for your playstyle, friends, or community. Whether you’re experiencing long wait times, want to be on a more active server, or need to join friends who are playing on a different server, transferring servers can be a useful option.

In this article, we will provide you with a complete guide on how to transfer servers in Throne and Liberty Lucent, along with insights into why server transfers may be necessary and what to expect during the process.

Why Transfer Servers in Throne and Liberty?

Before diving into the step-by-step guide on how to transfer servers, it’s essential to understand why you might want to make this move in the first place. Here are a few reasons why players may consider transferring to a different server in Throne and Liberty:

Long Wait Times: If you find that the server you are on has long queue times, especially during peak hours, it can become frustrating. A server transfer can help alleviate this issue by moving to a less populated server with faster login times.

Joining Friends or Guilds: Often, players may start the game solo and make progress on one server, only to realize that their friends or guild members are playing on a different server. A server transfer makes it easier to join them without having to start over from scratch.

Better Server Activity: Some servers may have a more active player base, leading to more dynamic in-game events, PvP battles, and competitive rankings. If you want to be part of a bustling community, moving to a more populated server may be necessary.

Avoiding Imbalance in Faction or Region Control: In certain cases, servers may be dominated by one faction or region, making gameplay less competitive. If you’re looking for a more balanced or competitive environment, transferring servers could provide a fresh start.

Personal Preferences: You may prefer a different time zone or language region. Some players find that transferring servers allows them to connect with a community that better suits their playstyle or culture.

How to Transfer Servers in Throne and Liberty

Server transfers in Throne and Liberty are generally straightforward, though there are specific steps you need to follow to ensure a smooth transition. Here’s a step-by-step guide on how to transfer your character to a new server:

1. Check Server Transfer Eligibility

Not all players may be eligible to transfer servers at all times. Before you begin the process, make sure you meet the following conditions:

Character Level Requirements: Some games may impose a minimum level requirement for server transfers. For example, you may need to be at least level 30 before being eligible for a transfer.

Pending Transactions: If you have any ongoing transactions such as auction house listings or in-game purchases, you’ll need to wait until they are completed before initiating the transfer.

Cool-down Periods: Some games enforce a cool-down period after a server transfer. This means you may not be able to transfer again immediately after the first one. Be sure to review any restrictions before proceeding.

2. Access the Server Transfer Menu

Once you confirm that you are eligible for a server transfer, you can access the transfer menu. Here’s how:

Open the Game Menu: In Throne and Liberty, you will need to go to the main game menu by pressing the designated button on your keyboard or controller.

Navigate to the Server Transfer Option: In the game menu, there should be a section dedicated to account management or server settings. Look for an option labeled “Server Transfer” or something similar.

Select the Server Transfer Option: Once you click on the server transfer option, you’ll be presented with a list of available servers.

3. Choose the Destination Server

In this step, you will need to select which server you want to transfer your character to. Consider the following factors when making your choice:

Population and Activity: Check the population of the server and how active it is. You don’t want to move to a server that’s either overcrowded or too empty.

Faction Balance: If the game features factions or teams, make sure that the new server has a balanced faction setup, so you don’t end up on a server where one faction dominates.

Time Zone and Language Preferences: If you’re looking for a server that suits your timezone or language preference, be sure to select a server that aligns with your schedule or community.

Region Control: If the server you’re considering has a faction in control of the region you’re interested in, ensure that the transfer won’t force you into an uncompetitive environment.

4. Review Server Transfer Details

After selecting your desired server, you’ll be shown some important details about the server transfer process, including the following:

Transfer Costs: Some games may charge a fee for transferring between servers. Make sure to check if there are any costs associated with the transfer.

Transfer Restrictions: As mentioned, there might be certain restrictions like a cooldown period or requirements for specific in-game actions. Review these details before proceeding.

Character and Inventory Considerations: Typically, your character’s level, inventory, items, and achievements will transfer over with you. However, it’s always a good idea to confirm whether any items or progress will be lost during the process.

Waiting Time: Some server transfers may require a waiting period, especially if there are technical reasons behind the move.

5. Confirm the Transfer

Once you’ve reviewed the details and are confident about your transfer choice, click the Confirm button to initiate the transfer. Your character will then be moved to the new server. The time it takes to complete the transfer may vary depending on the game’s server load and infrastructure.

6. Log Into the New Server

After the transfer is complete, log into the game and select the newly transferred server from the server list. You should see your character and all your progress intact, as long as the transfer was successful.

Things to Keep in Mind After the Server Transfer

While server transfers are usually seamless, there are a few things you may want to keep in mind once you’ve moved to a new server:

Guilds and Friends: If you were part of a guild on your old server, you may need to either transfer your guild (if that’s an option) or join a new one. Additionally, your friends may need to add you again to their friends list or invite you to their new server guild.

Auction House Listings: Any auction house listings you had on your previous server will be reset, and you will need to relist your items.

Active Events: If there were any server-specific events, you may have missed some of them during your transfer. However, new events will soon be available on the new server.

Server-Specific Rewards: Some games may offer server-specific bonuses or rewards, so be sure to check if you are eligible for any benefits upon your arrival at the new server.

Common Issues and Troubleshooting

While server transfers are usually straightforward, players sometimes experience issues during the process. Here are some common issues and how to resolve them:

Transfer Not Available: If the server transfer option isn’t available, make sure you meet all eligibility requirements (e.g., level, cooldown, pending transactions).

Stuck Transfer: If the transfer is taking longer than expected, try restarting the game or contacting customer support for assistance.

Lost Items or Progress: If you notice that some of your items or progress were not transferred, reach out to customer support immediately for assistance.

Conclusion

Transferring servers in cheap TL Lucent can offer you a fresh start, a better experience, and a chance to join a more active and engaging community. By following the simple steps outlined in this guide, you can seamlessly move your character to a new server with minimal downtime and hassle. Whether you’re looking to join friends, avoid long wait times, or seek a more balanced environment, a server transfer can improve your overall gaming experience.

Remember to always review the eligibility criteria, transfer costs, and potential restrictions before initiating the process, and enjoy your new adventure in Throne and Liberty!
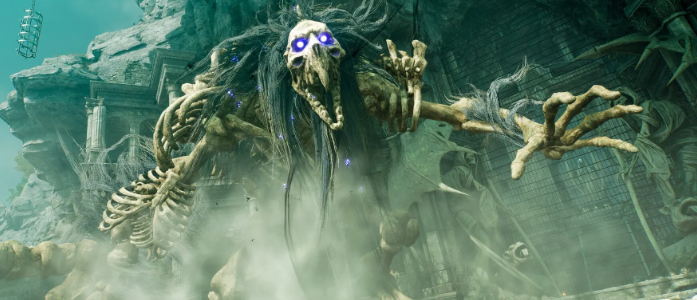
Throne and Liberty: What Is Taedel’s Tower

Throne and Liberty: What Is Taedel’s Tower

Throne and Liberty is one of the most highly anticipated MMORPGs of recent years, offering players a sprawling world full of adventure, epic quests, and rich lore. Developed by NCSOFT, the game is set in a high-fantasy world brimming with magic, political intrigue, and conflict. In this universe, players can take on a variety of roles—warriors, mages, or mercenaries—exploring massive open landscapes and engaging in player-driven storylines.

One of the most intriguing elements of Throne and Liberty Lucent is the presence of Taedel’s Tower, a mysterious and pivotal location within the game’s expansive world. What is Taedel’s Tower? Why does it play such a significant role in the story of Throne and Liberty? And how can players navigate its challenges and secrets?

In this article, we will explore the origins, significance, and gameplay mechanics related to Taedel’s Tower in Throne and Liberty. We’ll delve into the lore behind it, its role in the game’s world, and why it’s a location every player will want to visit—and conquer.

The Setting of Throne and Liberty

Before diving into Taedel’s Tower itself, it’s essential to understand the world of Throne and Liberty. The game is set in the fantastical world of Liber, a land filled with diverse races, cultures, and political systems. The continent is split into various regions, each home to unique environments, factions, and lore.

At its core, Throne and Liberty revolves around the conflict between the forces of order and chaos. The game offers both PvE and PvP elements, allowing players to decide whether they want to follow the story’s predefined paths or carve out their own destiny through interaction with other players.

The story weaves elements of grand political intrigue, environmental challenges, and personal quests. The land of Liber is ruled by various monarchs and leaders, with each region carrying its own struggles. Into this world steps Taedel’s Tower—a structure that holds the promise of unimaginable power, forbidden knowledge, and a series of in-game challenges that will test even the most seasoned adventurers.

The Origins of Taedel’s Tower

Taedel’s Tower is shrouded in mystery, and its origins are deeply tied to the history of Liber itself. According to in-game lore, the tower was built long ago by a powerful sorcerer named Taedel, whose ambition knew no bounds. Taedel was a genius and a visionary, possessing a mastery over magic and a profound understanding of the forces that govern the world.

It is said that Taedel sought to ascend beyond the mortal realm, aiming to unlock the secrets of the gods themselves. His goal was to transcend the boundaries of time and space, to harness powers that could reshape the world in his own image. As part of his grand ambition, he constructed a towering structure, imbued with potent magical wards, ancient runes, and traps designed to safeguard the tower’s secrets.

However, as with many such tales of hubris, Taedel’s ambition ultimately led to his downfall. In his pursuit of ultimate power, Taedel became consumed by the very magic he sought to control, losing both his mind and his life. The tower, once a symbol of his potential, became a cursed monument—a place filled with dangerous entities, ancient relics, and powerful magical forces that could either grant great power or bring about certain doom.

Since Taedel’s demise, the tower has remained a place of legend and terror. Many have attempted to unlock its secrets, but few have returned. Its dangerous trials, complex puzzles, and formidable guardians have deterred all but the most foolhardy adventurers.

The Role of Taedel’s Tower in Throne and Liberty

In Throne and Liberty, Taedel’s Tower serves as one of the most important and challenging locations within the game. Players encounter the tower through quests and lore, which guide them to the looming structure. The tower is a multi-tiered dungeon that players can explore and attempt to conquer.

There are several key features of Taedel’s Tower that make it central to the game’s narrative and gameplay:

1. Epic PvE Challenges

One of the primary draws of Taedel’s Tower is its rich PvE content. The tower is home to a series of escalating challenges, each more difficult than the last. Players must navigate treacherous traps, solve ancient puzzles, and face off against formidable bosses. The deeper you venture into the tower, the stronger the enemies become, requiring coordinated efforts, advanced strategies, and high-level character builds to overcome them.

The challenges are designed to test the mettle of players, with some requiring not just combat prowess but also the ability to solve riddles and engage in other puzzle-like mechanics. The tower is thus a perfect blend of combat and intellectual challenge, rewarding players who are not only strong but also clever.

2. Lore and Storytelling

Taedel’s Tower isn’t just a place for combat; it also plays a key role in the unfolding story of Throne and Liberty. As players explore the tower, they uncover fragments of Taedel’s history, his tragic downfall, and the dark secrets that still linger within its walls. These pieces of lore serve to enrich the game world and deepen the player’s engagement with the narrative.

Through exploring the tower, players can unlock hidden documents, journals, and dialogues that reveal more about Taedel’s life and his twisted experiments. Some of these revelations are vital to the overall plot of the game, tying into the broader themes of power, corruption, and ambition that run throughout the story of Throne and Liberty.

3. Powerful Loot and Rewards

For many players, the ultimate draw of Taedel’s Tower is the loot. The deeper you go into the tower, the more valuable and powerful the rewards become. Players can find rare and unique items that cannot be obtained anywhere else in the world of Liber. These include powerful weapons, enchanted armor, and magical artifacts that can enhance a player’s abilities and provide them with a significant advantage in future quests and battles.

Additionally, players who conquer the highest levels of the tower may unlock legendary items—relics imbued with the power of the gods themselves. These items are not only visually stunning but also come with unique buffs and abilities, making them highly sought after by the game’s most dedicated adventurers.

4. Group Content and Cooperative Play

While some players may attempt to tackle the tower alone, Taedel’s Tower is also designed for group content. Some of the tower’s most difficult challenges require players to form parties or alliances, as cooperation is often key to overcoming its most dangerous foes. Group mechanics—such as coordinated attacks, puzzle-solving, and resource management—play a major role in the tower’s design.

The tower’s cooperative nature encourages players to form guilds or alliances with others, fostering a sense of community and teamwork. Successful raids and dungeon runs through Taedel’s Tower often require players to rely on one another’s unique skills and abilities, making it an excellent feature for social and cooperative gameplay.

5. Endgame Content

Taedel’s Tower is also positioned as an essential piece of the endgame content in Throne and Liberty. After players have leveled up their characters and explored the open world of Liber, the tower serves as one of the ultimate tests. It is a place where only the most dedicated players can prove their worth and claim some of the rarest and most powerful rewards in the game.

It serves as a high-stakes dungeon where elite players gather to test their skills, complete tough quests, and engage in the most challenging content the game has to offer. For those who enjoy endgame content and competitive gameplay, Taedel’s Tower will be a critical location to return to repeatedly.

How to Conquer Taedel’s Tower

For players looking to take on the tower, here are a few tips and strategies:

Level Up Your Character: Make sure your character is at an appropriate level before attempting the tower’s higher floors. The tower’s challenges scale with difficulty, and lower-level characters may struggle against the enemies inside.

Gear Up: Equip your character with the best possible gear, focusing on both offense and defense. Many of the tower’s enemies hit hard, so you’ll need strong defensive equipment to survive.

Form a Team: While solo play is possible, the tower’s later stages are best tackled with a well-coordinated group. Assemble a party with complementary abilities, from healers to damage-dealers to tanks.

Study the Lore: Understanding the lore and the tower’s background will help you unravel its mysteries more easily. Pay attention to hidden texts and clues that may offer hints for solving puzzles or defeating bosses.

Prepare for Puzzles: Some floors contain complex puzzles that require a sharp mind to solve. Be ready to think critically and work together with your team to find solutions.

Conclusion

Taedel’s Tower in Throne and Liberty represents more than just a dungeon—it’s a rich and complex feature that blends storytelling, gameplay, and cooperative mechanics. As a central part of the game’s lore and endgame content, it challenges players to engage with its mysteries, fight its powerful enemies, and unlock the incredible rewards hidden within its walls.

Whether you’re seeking powerful loot, a deep dive into the lore of throne and liberty lucent buy, or simply a test of your skills and strategy, Taedel’s Tower offers one of the most exciting and rewarding experiences in the game. As you journey through the tower, remember that you’re not just exploring a monument to a fallen sorcerer—you’re uncovering the very secrets of the world itself.

Throne and Liberty: Roaring Temple Dungeon Guide

Throne and Liberty: Roaring Temple Dungeon Guide

In Throne and Liberty, dungeons play a central role in the game’s PvE content, offering players opportunities to Throne and Liberty Lucent, gain experience, and challenge themselves with powerful bosses. One of the most exciting and challenging dungeons in the game is the Roaring Temple. This high-level dungeon provides both a rich lore experience and intense combat encounters, making it an essential part of the endgame content.

The Roaring Temple is designed for experienced players who are ready to test their combat skills and coordination in a party setting. Whether you’re exploring it for the first time or looking for tips to improve your efficiency in completing this dungeon, this guide will provide all the information you need to conquer the Roaring Temple and claim its rewards.

Roaring Temple Dungeon Overview

The Roaring Temple is a high-level dungeon located in a remote and dangerous area of the world of Throne and Liberty. It features multiple stages, each filled with unique enemies, challenging puzzles, and tough bosses that will test your team’s strategy and combat prowess. The dungeon is known for its rich backstory, which ties into the game’s larger narrative about ancient civilizations, powerful deities, and forgotten secrets.

The Roaring Temple is known for offering some of the best loot in the game, including rare crafting materials, legendary gear, and valuable resources that can be used for upgrading and enhancing your character’s equipment. However, it’s not an easy dungeon to conquer. Players will need to bring their A-game, especially in terms of strategy, positioning, and understanding each boss’s mechanics.

Dungeon Requirements

Before diving into the Roaring Temple, there are a few things players should know about the dungeon’s requirements:

Level Requirements:

The Roaring Temple is meant for high-level players, typically requiring a character level between 40 and 50. You’ll need to be adequately leveled and have access to endgame gear in order to survive the dungeon’s challenges. Attempting the dungeon at a lower level or with underpowered gear will likely result in failure.

Party Composition:

Like many dungeons in Throne and Liberty, the Roaring Temple is best completed with a full group. A balanced party should consist of the following roles:

Tank: A warrior or other high-defense class to absorb damage and control enemies.

Healer: A class that can keep the group’s health high, especially during long boss fights.

DPS (Damage Dealers): A mix of ranged and melee DPS characters to provide consistent damage output.

Communication and coordination are crucial in the Roaring Temple, so it’s highly recommended to have voice chat or a reliable form of communication with your team.

Dungeon Mode:

The Roaring Temple is available in Normal, Hard, and Elite modes. Each difficulty increases the challenge significantly:

Normal Mode: Suitable for less-experienced players or those looking for a more straightforward run. While the bosses still pose a challenge, the mechanics are generally easier to handle.

Hard Mode: A step up in difficulty, with tougher enemies, higher damage output, and more complex mechanics. The rewards are better, but the dungeon requires better coordination and timing.

Elite Mode: The highest difficulty, reserved for endgame players. Enemies are incredibly tough, with devastating attacks and complex mechanics that require precise execution. The rewards are exceptional, but only the most skilled teams will be able to succeed in Elite mode.

Dungeon Layout and Key Areas

The Roaring Temple is divided into several distinct areas, each containing unique encounters, environmental hazards, and challenges that require different strategies. Here’s a breakdown of the dungeon’s layout:

1. Entrance and First Hall

The first area of the Roaring Temple is relatively simple but sets the tone for the dungeon’s difficulty. Here, players will encounter low-level trash mobs that offer a warm-up before the real challenges begin. These enemies are mainly humanoid and animalistic in nature, with some minor magical abilities.

Key Mechanics: Pay attention to environmental hazards like traps and hidden pressure plates. Some traps will activate when players step on them, causing damage to the party or immobilizing them temporarily.

2. The Labyrinthine Path

The second area is a winding maze filled with enemies that require both strategy and teamwork to overcome. The labyrinth has numerous dead-ends and hidden passages that can lead to either treasure or ambushes. Players must clear waves of enemies while navigating the maze to find the entrance to the next section.

Key Mechanics: The maze is often shrouded in darkness or obscured by fog, making navigation difficult. Use light sources (such as torches) to reveal hidden paths, but be cautious as enemies may lie in wait at every turn.

3. The Chamber of Echoes (Midway Boss)

Upon reaching the Chamber of Echoes, players will face off against the first major boss of the dungeon. This boss is known for its powerful area-of-effect (AoE) attacks and summons of lesser creatures throughout the battle.

Boss Mechanics:

AoE Roar: The boss will occasionally emit a roar that deals significant damage in a large radius. Players must spread out to avoid the full brunt of the attack.

Summon Minions: The boss can summon smaller, weaker enemies during the fight. These enemies should be quickly dealt with, as they can overwhelm the party if ignored.

Strategy: Divide the party to deal with the minions while focusing the bulk of the damage on the boss. Keep the tank in position to absorb damage, and have the healer prepared to respond quickly when the AoE roar occurs.

4. The Roaring Temple Courtyard (Final Boss Area)

After overcoming the maze and defeating the Chamber of Echoes boss, players will enter the final and most difficult section of the Roaring Temple: the Roaring Temple Courtyard. This area is home to the dungeon’s final boss, an ancient and powerful entity that commands the elements and can unleash devastating attacks.

Boss Mechanics:

Elemental Fury: The final boss will periodically use elemental magic attacks, including fire, ice, and lightning. Each element has different effects, such as fire causing burn damage over time, ice freezing players, and lightning stunning anyone within its radius.

Environmental Hazards: During the fight, parts of the arena will change depending on the element being used. For example, fire attacks will ignite sections of the floor, while lightning strikes will cause dangerous zones of high voltage.

Strategy:

Elemental Awareness: Players must be vigilant and adapt to the changing elemental zones. For example, if the floor becomes engulfed in fire, players should move quickly to avoid damage.

DPS Focus: The DPS players must focus on the boss while avoiding elemental attacks. Healers should keep the group topped off, and tanks must be prepared to handle the boss’s heavy physical damage and occasional debuffs.

5. The Hidden Treasury (Optional Area)

After defeating the final boss, players may be able to access the Hidden Treasury, a secret area that contains high-level loot, including legendary gear and rare crafting materials. This area requires players to solve a puzzle or defeat a hidden mini-boss, but the rewards are worth the effort.

Key Mechanics: The Hidden Treasury is usually filled with additional enemies, traps, and environmental challenges. Players will need to be prepared for a final fight before claiming the treasure.

Tips for Completing the Roaring Temple Dungeon

Team Coordination: Communication and coordination with your team are key to success in the Roaring Temple. Make sure everyone knows their role and the mechanics of each boss fight.

Focus on Mechanics: Boss mechanics are the key to surviving the Roaring Temple. Ensure your group is aware of attack patterns, AoE zones, and any summons or environmental hazards.

Prepare Consumables: Bring potions, buffs, and other consumables that can help you survive during the dungeon’s more challenging fights. Having a stockpile of healing potions and buffs can make a big difference in tougher battles.

Adapt to Elemental Changes: The final boss fight revolves around elemental mechanics. Pay attention to the environment and adjust your positioning and strategy accordingly to avoid elemental damage.

Optimize Gear: Ensure that your gear is upgraded and appropriate for the dungeon. If possible, equip armor and accessories that offer resistance to elemental damage, especially for the final boss.

Conclusion

The Roaring Temple Dungeon is one of the most challenging and rewarding dungeons in Throne and Liberty. Its complex layout, tough bosses, and high-value rewards make it a key endgame activity for players looking to improve their gear and prove their skill. By preparing thoroughly, communicating effectively with your team, and understanding the dungeon’s mechanics, you can conquer the Roaring Temple and reap the rewards it has to offer.

Whether you’re aiming for buying throne and liberty lucent, experience, or simply the thrill of defeating powerful bosses, the Roaring Temple promises to be a memorable experience for players at the peak of their progression in Throne and Liberty.

Gearing Up in Throne and Liberty: A Guide to Forging Your Path

Gearing Up in Throne and Liberty: A Guide to Forging Your Path

Throne and Liberty’s expansive world offers a multitude of ways to carve your destiny, and gearing up is no exception. This guide delves into the various paths you can take to acquire powerful equipment, from crafting your personalized arsenal to facing down fearsome bosses and exploring the enticing, yet controversial, Marketplace.

Crafting: The Forge of Your Future

At the heart of Throne and Liberty’s gearing system lies crafting. This isn’t just a late-game option; it’s a foundational pillar. From your first steps in the world, you’ll be gathering materials, honing your skills, and crafting your weapons, armor, and accessories. Each upgrade, from humble green to dazzling purple, feels earned and rewarding.

The Thrill of the Hunt: Raiding and Bosses

For those who crave the thrill of the hunt, challenging bosses and group content offer a different path to gear acquisition. Raids, guild activities, and open-world bosses drop coveted equipment, each piece imbued with the echoes of epic battles and hard-won victories. Be prepared to strategize with your team, master your skills, and face down formidable foes for the chance to claim these prestigious rewards.

The Marketplace: Convenience with a Caveat

Throne and Liberty also offers a shortcut – the Marketplace. Here, you can spend “TL Lucent,” a paid currency, to directly purchase gear. Buy Throne and Liberty Lucent through MMOexp website, can get more discounts. While this offers undeniable convenience, it’s important to consider the potential drawbacks:

• Pay-to-Win Concerns: The presence of a paid currency raises concerns about pay-to-win mechanics. While NCsoft has assured players that high-end gear will not be directly purchasable, the Marketplace’s influence on the game’s economy remains a point of discussion.

• The Value of Effort: Gear earned through crafting, raiding, and boss encounters carries a different weight. It represents time, skill, and teamwork, making it a more personal and satisfying achievement.

Ultimately, the choice of how to gear up in Throne and Liberty is yours. Whether you forge your path through crafting, face epic challenges in raids, or choose the convenience of the Marketplace, remember that the true reward lies in the journey itself.

Beyond the Basics:

This guide is just the beginning. Here are some additional tips for navigating the world of gear in Throne and Liberty:

Enchantment: Upgrade your existing gear through enchanting, adding new layers of power and customization.
Gear Transfer: Transfer the enchantment level of your old gear to your new gear, allowing you to seamlessly upgrade your equipment.
Market Savvy: Monitor the Marketplace for bargains and strategic purchases.
Community & Guilds: Join a guild or team up with friends to tackle challenging content and share the spoils of victory.

The world of Throne and Liberty awaits, adventurer. What path will you forge to claim your gear and conquer its challenges? Share your strategies and experiences in the comments below, and let’s build a community of gear-savvy heroes!