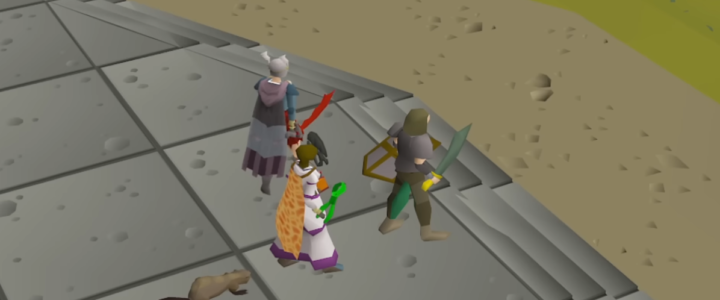
Old School RuneScape: A Complete Guide to Obtaining and Using The Scythe of Vitur

Old School RuneScape: A Complete Guide to Obtaining and Using The Scythe of Vitur

The Scythe of Vitur is one of the most powerful and prestigious melee weapons in Old School RuneScape (OSRS). Designed specifically for high-level PvM (Player versus Monster) content, this two-handed slash weapon is a staple for elite players tackling the game’s toughest bosses and raid encounters.

In this guide, we’ll cover what the Scythe of Vitur is, how to get it (uncharged), its drop rate, requirements for Theatre of Blood, charging costs, and whether it’s worth the investment.

What Is the Scythe of Vitur?

The Scythe of Vitur is a two-handed slash weapon obtained exclusively from the Theatre of Blood (ToB) raid. What makes it unique is its special attack mechanic:

·It can hit up to three times per attack against large enemies.

·Each hit rolls independently for accuracy and damage.

·This allows for extremely high DPS (damage per second) in optimal scenarios.

Because many endgame bosses in OSRS are classified as large targets, the Scythe can outperform nearly every other melee weapon when used correctly.

However, the Scythe of Vitur cannot be used effectively in its uncharged state. It must be charged with blood runes to function, making it one of the most expensive weapons to maintain in the game.

Where Does the Scythe of Vitur Come From?

The only way to obtain an uncharged Scythe of Vitur is through the Theatre of Blood raid.

There are:

·No quest rewards

·No NPC shops

·No alternative drop sources

If you want to earn one yourself, completing Theatre of Blood is mandatory.

Theatre of Blood Location

The raid is located in Meiyerditch, within the Morytania region. It is widely considered one of the most mechanically demanding PvM activities in OSRS.

ToB is a team-based raid, requiring coordination, communication, and strong gear setups. It is not designed for casual players and remains one of the ultimate challenges in the game.

Requirements to Enter Theatre of Blood

Before attempting Theatre of Blood, players should meet the following requirements:

·Completion of A Taste of Hope

·High combat stats (90+ recommended in melee, ranged, and magic)

·Strong PvM gear and supplies

·A coordinated team (solo attempts are extremely difficult and not recommended)

While technically accessible earlier, attempting ToB without proper stats and gear will significantly reduce your chances of success.

How to Get the Scythe of Vitur (Uncharged)

1. Complete Theatre of Blood Runs

The Scythe of Vitur is a unique reward that can appear in the completion chest after defeating Verzik Vitur, the final boss of Theatre of Blood.

Loot distribution is influenced by:

·Individual performance

·Damage contribution

·Survival

·Overall team efficiency

Only one unique item can appear per raid completion, and the Scythe of Vitur is the rarest item on the standard ToB loot table.

2. Understand the Drop Rate

The estimated drop rate for the Scythe of Vitur is approximately 1 in 650 raids in standard mode.

This makes it:

·One of the rarest raid drops in OSRS

·One of the most prestigious melee weapons in the game

Since rewards are shared among team members, your personal odds are influenced by:

·Team size

·Total raid completions

·Consistent performance

Even highly experienced players should expect a long grind unless luck is firmly on their side.

3. Survive and Contribute Consistently

While Theatre of Blood rewards are RNG-based, consistent survival and strong performance improve overall raid efficiency.

Frequent deaths:

·Slow down completion times.

·Reduce overall team performance.

·Can indirectly impact long-term loot outcomes

Players who master boss mechanics, minimize mistakes, and maintain consistent damage output are more likely to see success over time.

Buying the Scythe of Vitur Instead

For many players, completing hundreds of Theatre of Blood runs simply isn’t realistic. Fortunately, the uncharged Scythe of Vitur is tradeable and can be purchased from the Grand Exchange.

The downside? The price typically sits in the billions of GP, depending on market conditions.

Because of this, efficient wealth-building strategies become crucial. Common methods include:

·High-profit PvM

·Flipping items on the Grand Exchange

·Raids such as Chambers of Xeric or Tombs of Amascut

·Long-term boss grinding

With sufficient OSRS gold, players can bypass the Theatre of Blood grind and immediately access one of the strongest melee weapons in the game.

Charging the Scythe of Vitur

After obtaining the uncharged version, the Scythe must be charged using blood runes.

Important details:

·Blood runes are used directly on the weapon to add charges

·Every attack consumes charges

·The upkeep cost is extremely high

Because each swing consumes charges, the Scythe is one of the most expensive weapons to operate in OSRS.

For this reason, it is best used in:

·High-value PvM encounters

·Endgame raids

·Bosses where maximum DPS is critical

It is generally not recommended for casual Slayer or low-profit activities.

Is the Scythe of Vitur Worth It?

For dedicated endgame PvM players, the answer is almost always yes.

The Scythe excels in:

·Theatre of Blood

·Chambers of Xeric (specific bosses like Tekton)

·Nex

·Corporeal Beast

·Other large-target encounters

Its unmatched damage potential against large bosses makes it a top-tier weapon for speed runs and efficiency-focused gameplay.

However, for mid-level players or those without consistent GP income, the Scythe’s maintenance costs can feel overwhelming. In those cases, alternative weapons may provide better overall value.

Final Thoughts

Getting the Scythe of Vitur (uncharged) in OSRS is a true test of dedication, skill, or wealth. Whether you grind hundreds of Theatre of Blood runs or acquire it through the Grand Exchange by choosing to buy OSRS items and gold from trusted sources, the Scythe remains one of the most prestigious weapons in the game.

OSRS:How Feather Arrows and Archery Skill Unlock Key Quests

OSRS:How Feather Arrows and Archery Skill Unlock Key Quests

Old School RuneScape offers a vast world filled with quests, skills, and challenges designed to keep players engaged. For those who specialize in ranged combat, managing ammunition is essential. Among the many types of arrows available, feather arrows stand out because of their efficiency and the Archery-related quests they help unlock.Your time is valuable – skip the hassle and buy OSRS gold at RSgoldfast today!

The Importance of Feather Arrows in Ranged Combat

Ranged combat in OSRS depends heavily on a reliable supply of arrows. Unlike melee fighters who don’t need to worry about running out of ammo, ranged players must manage their arrow stock carefully. Feather arrows are popular due to their lightweight nature, which lets you shoot quickly without sacrificing damage potential.

Crafted by combining feathers with normal arrows, feather arrows are easy to make and stockpile. This makes them ideal for both training and questing purposes. However, to fully take advantage of feather arrows, you need to level up your Archery skill, which opens the door to several important quests.

Quests Unlocked by Archery Levels with Feather Arrows

Many quests in OSRS require you to reach specific Archery levels, effectively making your feather arrow training a gateway to new adventures. Here’s a breakdown of key quests unlocked at various Archery milestones:

1.Toucan Hunting – Archery Level 5

    At the early stages of your ranged training, Toucan Hunting becomes available. This quest is perfect for beginners, introducing fundamental hunting and ranged combat mechanics as you explore OSRS rich world.

    2.Tourist Trap – Archery Level 10

      Once you hit Archery level 10, Tourist Trap unlocks. Known for its engaging narrative and fun challenges, this quest tests your strategic thinking and ranged skills. It also grants rewards that accelerate your overall progress.

      3.Evil Mind – Archery Level 50

        When you reach level 50 Archery, Evil Mind becomes accessible. This quest delves deeper into OSRS lore and features tougher enemies, making precise use of feather arrows critical to success.

        4.Sins of the Father – Archery Level 60

          A major milestone, Sins of the Father requires level 60 Archery. Besides an intriguing storyline, it offers the exclusive quest cloak—a symbol of your dedication and mastery of Archery. Because the level requirement cannot be bypassed, careful planning is essential.

          Going Beyond: Archery Level 95 and Completionist Goals

          For players aiming to complete all achievement diaries, reaching Archery level 95 is crucial. This elite skill level unlocks access to some of OSRS most challenging content, marking you as a true expert in ranged combat. While the path to 95 is demanding, the rewards and sense of achievement are highly rewarding.

          Tips for Efficient Archery Training with Feather Arrows

          Always Use Feather Arrows: Their low weight speeds up your attack rate and reduces fatigue during long training sessions.

          Join Mini-Games: Participate in mini-games like The Last Man Standing or The Nightmare Zone to level Archery while earning extra rewards.

          Complete Archery-Related Quests: Many quests grant Archery XP, so prioritize these to level up faster.

          Train on Dummies: If available, training dummies offer a safe way to practice Archery skills without combat risks.

          Feather arrows and the Archery skill are indispensable for ranged players in OSRS. They not only boost your combat effectiveness but also unlock a variety of quests that enhance your gameplay experience and immerse you in the game rich storylines. By focusing on Archery and completing these quests, you’ll elevate your character and enjoy all that OSRS has to offer.

          Ready to boost your progress? Services like RSgoldfast provide secure, reliable cheap RS gold to help you gear up and level faster, so you can jump straight into your next adventure!

          Mastering the Lone Tree Strategy in OSRS Glouphrie Path

          Mastering the Lone Tree Strategy in OSRS Glouphrie Path

          Old School RuneScape is full of intricate quests and hidden secrets, one of which is the Glouphrie Path. This journey leads players to the mysterious Langrambur, but reaching him requires a well-thought-out strategy. The Lone Tree strategy is one of the most efficient ways to navigate this challenge. This guide will provide a detailed breakdown of the necessary preparations, travel tactics, and key interactions to ensure your success.

          Preparation: Essential Gear and Supplies.Join a community of successful players – buy OSRS gold with RSgoldfast and thrive!

          Before setting off, assembling the right gear and supplies is crucial for survival and efficiency. Make sure you have the following items:

          Crossbow and Magic Grappling Hook – These are indispensable for traversing obstacles and reaching key locations.

          Crystal Wind Chime – A vital item for specific quest interactions.

          Battle Gear – Equip strong armor and weapons to defend against potential threats.

          Food and Potions – Stock up on healing items to maintain health during encounters with hostile creatures.

          With these essentials in hand, you’ll be well-prepared for the challenges ahead.

          Starting the Journey: The Big Tree and Gianne Jnr.

          Your quest begins at the Big Tree, a well-known landmark. Climb the ladder at its base to reach the upper platform, where you will find Gianne Jnr. in the northwest corner. Speaking with him is a crucial step, as he will provide key information about a failed delivery to Langrambur.

          During your conversation, Gianne Jnr. will reveal important coordinates: 2 degrees 7 minutes south, 3 degrees 7 minutes west. These coordinates serve as your primary navigational guide for the next phase of the quest.

          Navigating to Langrambur Location

          Now that you have your destination, the real challenge begins. The journey involves various terrains, potential obstacles, and dangerous NPCs. Here are some strategic tips to help you navigate effectively:

          Use Your Map – OSRS provides a detailed in-game map. Utilize it to plot a safe and efficient route.

          Stay Alert – The path may be riddled with aggressive creatures. Keep your battle gear ready to fend off any unexpected threats.

          Utilize the Magic Grappling Hook – Some areas require crossing gaps or climbing obstacles. Be ready to use your grappling hook at the right moments.

          By carefully following these steps, you will reach Langrambur vicinity without unnecessary detours or risks.

          Interacting with Langrambur

          Upon reaching Langrambur location, initiate a conversation with him to progress further in your quest. He holds valuable information regarding the Tangled Toad Leg, a key element in the storyline. His insights will likely lead to new tasks and challenges, so pay close attention to the dialogue options.Your OSRS journey deserves the best – get affordable buy Runescape gold quickly and easily with RSgoldfast!

          Advanced Strategies for Success

          To maximize your efficiency and ensure a smooth journey, keep the following strategies in mind:

          Plan Your Route in Advance – Mapping out your journey beforehand can save you time and resources.

          Inventory Management – Carry a balanced selection of healing items, potions, and combat gear to adapt to unexpected situations.

          Team Up When Possible – If the challenges become overwhelming, consider teaming up with other players. Group strategies often make combat and navigation easier.

          The Lone Tree Strategy in the Glouphrie Path is an exciting adventure that blends exploration, puzzle-solving, and combat. By preparing properly, navigating wisely, and employing strategic methods, you will successfully locate Langrambur and progress in your quest.

          With this guide in hand, you are well-equipped to tackle one of OSRS hidden challenges. Good luck on your adventure, and may your journey through the Glouphrie Path be both rewarding and thrilling!

          OSRS Updated 1 to 99 Thieving Guide

          OSRS Updated 1 to 99 Thieving Guide

          Welcome to my updated 1-99 Thieving guide! Whether you’re new to Old School RuneScape (OSRS) or a seasoned veteran looking to improve your skills, this comprehensive guide will help you maximize your XP gains, explore different methods of training, and optimize your journey to 99 Thieving.

          In this guide, we’ll first cover quests that can give you a jump start on your thieving gains. Then, we’ll explore helpful items and boosts that make training more efficient. After that, I’ll walk you through the simple route I’d recommend for 99 Thieving, followed by several alternate methods you can use to level up OSRS Powerleveling. And finally, we’ll discuss a few money-making options related to Thieving. With plenty of options to choose from, this guide is designed to offer flexibility based on your preferences and current OSRS progress.

          Quests for Early Thieving XP

          Many players overlook quests when considering Thieving training, but some excellent quests grant valuable XP early on. Completing these quests not only boosts your XP but also unlocks useful features and progress for future training. Here are a few key quests to get you started:

          1. Hazel Cult, Tower of Life, and Biohazard: These quests don’t have any Thieving requirements but can jump you from level 1 to 17 Thieving.
          2. Twilight’s Promise: This quest gives an additional 3k XP, bumping you up to 22 Thieving.
          3. Queen of Thieves: This quest will take you to 25 Thieving, a solid starting point for your Thieving journey.

          For more quest options to help with Thieving XP, refer to the full list provided in the description. Completing these early quests will set you on the right path, and 25 Thieving is a good milestone to reach before moving on to more intensive training methods.

          Helpful Items and Boosts for Thieving

          Several items can significantly enhance your Thieving training efficiency, especially when it comes to pickpocketing and looting. Here are a few essential items and boosts to keep in mind:

          Rogues Outfit

          The Rogues outfit, which you can obtain from the Rogues Den, is a must-have for maximizing Thieving gains. This set includes several pieces, each of which increases your chance to pickpocket double loot. If you wear the full set, you’re guaranteed to get double loot every time. To participate in this mini-game, you need 50 Thieving and 50 Agility. While the obstacles in the Rogues Den can drain both stats, with some practice and knowledge, the path becomes relatively easy to follow. Once you complete the Den, you’ll have a chance to receive the Rogues equipment crate, which allows you to choose your desired gear piece.

          Dodgy Necklace

          A Dodgy Necklace is an essential item for anyone doing pickpocketing. You can get these by enchanting an Opal Necklace or simply buying them from the Grand Exchange. When worn, the necklace gives you a 25% chance to avoid being stunned or damaged when failing a pickpocket attempt. This item has 10 charges, so be prepared to burn through them during long training sessions.

          Shadow Veil Spell

          The Shadow Veil spell, found in the Ancient Magicks spellbook, requires level 47 Magic and the completion of the Kingdom Divided quest. Using this spell provides a short duration where you won’t be stunned or take damage when failing a pickpocket. It stacks with the Dodgy Necklace effect, and the higher your Magic level, the longer the effect lasts.

          Ardouin Diaries

          Completing the Ardouin Diaries provides a helpful boost to pickpocketing. At medium diary completion, you get a 10% increase to pickpocket chances in Ardouin. If you complete the hard diaries, this bonus applies everywhere in the game, even without the Ardouin cloak.

          Thieving Cape

          Once you reach level 99 Thieving, you’ll be able to wear the Thieving Cape, which provides a 10% increased chance for pickpocketing success. While not essential for training, this cape is helpful when you’re looking to maximize efficiency in high-level money-making methods.

          Menu Entry Swapper

          One of the best quality-of-life changes you can make is enabling the Menu Entry Swapper plugin on RuneLite. This plugin allows you to change the default interaction with NPCs. For Thieving, you can set the “Pickpocket” option to left-click, which will save you time and prevent you from mistakenly attacking or interacting with NPCs in a way you didn’t intend. This feature is also available for mobile players, making Thieving more streamlined on all platforms.

          My Recommended 1-99 Thieving Route

          Now that we’ve covered quests and useful items, let’s take a look at my recommended path to 99 Thieving. This route is designed to be efficient and straightforward, especially for players who prefer traditional training methods.

          Levels 1-5: Pickpocketing Men/Women

          You can start training Thieving as soon as you’ve completed the introduction to the game and can access NPCs. Men and women are found in many towns and cities, with Lumbridge being the most accessible. You’ll receive coin pouches instead of direct coins from these NPCs, which you can open for small amounts of OSRS gold. Wearing the Rogues outfit increases your loot chances, making these low-level pickpocketing opportunities much more rewarding.

          Levels 5-25: Bakery Stalls (Ardouin)

          At level 5, move on to bakery stalls in Ardouin. There are multiple bakery stalls in the city, but for the fastest XP, I recommend using the stall located in the northeast of the square. You can stand directly on the square with the baker and steal from him without being noticed. The nearby guards won’t aggro you unless you make a mistake. If you do aggro them, you’ll have to run a short distance to get them off your trail.

          Levels 25-51: Fruit Stalls (Hosidius)

          From level 25, you can begin looting fruit stalls in Hosidius. The stalls are near the bank, but for the best XP rates, head east to the stalls in the nearby house. Fruits here are of little value, so don’t worry about the potential for wasting inventory space. The added benefit of using Strange Fruits for run energy can save you on stamina potions, making this an economical training method. By level 51, you should be set to move on to more advanced methods.

          Levels 51-99: Pyramid Plunder (Sopanam)

          Pyramid Plunder in Sopanam is my go-to method for levels 51 to 99. To access it, you’ll need to complete the Icthlarin’s Little Helper quest. Once unlocked, you can use a Pharaoh’s Scepter or travel to Sopanam using the Magic Carpet system. The method involves looting urns, sarcophagi, and a golden chest within a time limit of 5 minutes per run. Focus on looting urns for XP and avoid sarcophagi, as they give slow strength XP instead. The key is to loot the golden chest each time for a chance at a Pharaoh’s Scepter. You’ll need to have food and anti-poison on hand, as certain urns can poison you. As you progress and unlock new rooms, your XP rates will improve significantly.

          Alternate Methods for Thieving XP

          If you’re looking for variety or higher intensity training, there are a few alternate methods worth considering:

          Chambers of Xeric

          In the Chambers of Xeric, there is a puzzle room focused solely on Thieving. While not the fastest method, it’s a great option if you’re participating in raids and want to level up Thieving passively while helping your team complete the raid.

          Pickpocketing High-Level NPCs

          Once you’ve reached higher Thieving levels, you can start pickpocketing NPCs that provide significant rewards. NPCs like Ardouin Guards, Master Farmers, or the like can offer higher XP per pickpocket. However, these methods can be more challenging and require a lot of attention.

          Money-Making with Thieving

          Thieving isn’t just a fast way to level up; it can also be a lucrative money-making skill or buy RuneScape gold. Some profitable methods include:

          • Pickpocketing Elf Warriors: These high-level NPCs drop valuable items like the Elven Signet and high-value coins.
          • Master Farmers: Pickpocketing these farmers can yield valuable seeds, herbs, and other high-value items.
          • Looting Pyramid Plunder: The Pharaoh’s Scepter, while rare, can be worth millions of coins.

          Conclusion

          Thieving is a fun and rewarding skill in OSRS, offering a variety of methods to help you achieve your goal of 99. Whether you prefer questing, traditional pickpocketing, or more specialized methods like Pyramid Plunder, there are plenty of ways to level up and make some profit along the way. By combining useful items, boosts, and optimal routes, you’ll make quick progress towards your goal of becoming a master thief!

          The Most INSANE OSRS Hard Clue Ever Recorded!

          The Most INSANE OSRS Hard Clue Ever Recorded!

          Old School RuneScape (OSRS) is filled with a vast array of challenges and adventures for players to undertake, and one of the most rewarding and elusive activities in the game is completing clue scrolls. These treasure hunts lead players to hidden caches of loot, but some clues are far more difficult than others, especially when dealing with Hard Clue Scrolls. Hard clues are a step up from easy and medium clues and require players to solve more complex puzzles, complete difficult combat encounters, and endure multiple steps.

          Among these, there are certain Hard Clue Scrolls that go above and beyond in terms of difficulty, randomness, and, quite frankly, sheer absurdity. In this article, we’ll dive into the story of one of the most insane Hard Clue Scrolls ever recorded in OSRS gold—a clue scroll sequence that involved some truly mind-boggling randomness, extreme player perseverance, and some downright unbelievable outcomes.

          What Is a Hard Clue Scroll?

          Before we dive into the specifics of the most insane Hard Clue Scroll ever recorded, let’s briefly explain what a Hard Clue Scroll actually entails.

          Hard Clue Scrolls are treasure trails that require players to solve a series of clues, which can range from riddles and puzzles to specific coordinates on the world map. After completing these clues, players are rewarded with valuable items, typically including rare gear, cosmetic items, or other treasures. The most desirable rewards often come from the final treasure chest, which can include items like Bandos items, Armadyl gear, and Third Age equipment.

          Hard Clue Scrolls typically require higher-level skills, such as 70+ in skills like Crafting, Hunter, and Agility. They also feature tougher combat encounters, and certain clues require players to traverse more dangerous parts of Gielinor.

          Now, let’s explore one of the most jaw-dropping and mind-boggling Hard Clue Scrolls ever completed in OSRS.

          The Insane Hard Clue Scroll: A Tale of Endless Steps and Unbelievable Luck

          The journey towards the “most insane Hard Clue Scroll” started with a regular treasure trail, but it quickly escalated into a truly epic and frustratingly random sequence. For this example, we turn to the story of a player named “Kriil”, a well-known player in the OSRS community who shared their experience on Reddit. This incredible clue took the player through a multitude of bizarre twists and turns, showcasing both the unpredictability and difficulty of Hard Clue Scrolls.

          The Beginning: An Average Start

          Kriil was completing Hard Clue Scrolls as part of their regular routine. Like many players, they were hoping for an exciting loot drop—possibly a rare Third Age item or even a coveted piece of Armadyl gear. The clue started like any other, requiring Kriil to solve a relatively straightforward puzzle, which involved a simple coordinate location.

          However, what seemed like a standard clue took a strange turn when they arrived at the destination and found that the clue required a trickstep (an additional step that often involves solving a sub-puzzle or using a specific item). This trickstep demanded that Kriil head to a much more dangerous location, but things quickly escalated beyond normal expectations.

          A Sequence of Impossible Steps

          What made Kriil’s Hard Clue Scroll insane wasn’t the difficulty of each step, but the sheer absurdity of the sequence of clues. The steps kept leading to progressively more difficult locations with increasingly uncommon requirements.

          Step 1 – A Wilderness Encounter: The first trickstep took Kriil into the Wilderness, a PvP-enabled area where player versus player combat is allowed. This area is notorious for its danger, as players are at risk of being attacked by other players while completing tasks. Here, Kriil was tasked with defeating a high-level boss that would drop an essential item for the next clue step. Unfortunately, this boss was located in a multi-combat zone, meaning Kriil had to deal with the threat of multiple enemies at once. The Wilderness is already one of the most hostile areas of the game, and navigating it added a layer of risk and tension to the clue.

          Step 2 – A Rare Item Requirement: The second clue required Kriil to use an item that was particularly rare and hard to obtain. The rune pouch, which allows players to store multiple types of runes, was the key item here. However, getting this item was no simple task—it required Kriil to complete a tough set of requirements, including high-level Slayer tasks and a long grinding session to gather the necessary items. Kriil also had to complete a specific questline to obtain the required item. This wasn’t something that could be done quickly, and the process took many hours of focused gameplay.

          Step 3 – A Location Puzzle in the Desert: The next step in the sequence took Kriil to a remote desert location, where they needed to solve a complex puzzle to continue. The puzzle required them to match several items that could only be found in a very specific part of the desert. To make matters worse, the area was swarming with aggressive enemies, and the puzzle had multiple possible solutions, making it hard to discern the correct one on the first attempt.

          Step 4 – A Double Trickstep: By this point, Kriil was becoming frustrated, as they were expecting to finally reach the treasure chest. However, the clue decided to throw in a curveball. It led to not just one trickstep, but two, back-to-back, each requiring a different quest item and a new travel location that Kriil had to reach via dangerous means. This stretch of the clue took them all over Gielinor, often crossing dangerous regions that would either require the use of high-level teleports or a dangerous journey on foot.

          Step 5 – The Final Boss Fight: After enduring all the previous steps, Kriil finally reached the ultimate challenge: a boss fight. But this was no ordinary boss fight. The clue required them to fight one of the toughest bosses in the game, Vorago, a boss that requires intricate team mechanics, precise timing, and a great deal of gear and preparation. It was a rare requirement for a Hard Clue Scroll, and facing Vorago solo was almost unheard of.

          At this point, Kriil was on the brink of despair. They had invested countless hours into this single clue scroll, and each step seemed to raise the difficulty exponentially. However, true to the nature of a dedicated OSRS player, Kriil persevered. With the correct gear, a fair amount of luck, and some solid gameplay, they finally defeated the boss and completed the clue scroll.

          The Reward: A Reward Beyond Belief

          After enduring one of the most grueling sequences ever recorded, Kriil opened the final chest to claim their reward. As the chest’s contents appeared on their screen, Kriil could hardly believe their eyes.

          They had received an Armadyl chestplate—a rare and highly sought-after item in OSRS.

          The story of Kriil’s insane Hard Clue Scroll quickly spread across the OSRS community, as players marveled at the sheer difficulty of the clue and the insanity of the sequence. It became an example of just how unpredictable and intense Hard Clue Scrolls can be, but also a reminder of the perseverance required to complete them.

          Why Was This Clue So Insane?

          So, what made this Hard Clue Scroll so insane? It wasn’t just the difficulty of any individual step; it was the bizarre randomness and the almost unimaginable combination of requirements that made it unique. This clue scroll took Kriil across all corners of Gielinor, from PvP zones to high-level bosses, from rare item requirements to dangerous puzzles. It pushed them to the limits of their resources, time, and skill.

          Furthermore, the final reward, which was an Armadyl chestplate, wasn’t the most valuable drop one could get, but the satisfaction of completing such an absurd sequence made it one of the most memorable and “insane” Hard Clue Scrolls in OSRS history.

          Conclusion

          The story of Kriil’s insane Hard Clue Scroll serves as a reminder of just how crazy OSRS can be, especially when it comes to treasure trails. These clues are not just about the final reward; they’re about the journey—the trials, the challenges, and the unpredictable twists that make Old School RuneScape a game like no other. Whether you’re in it for the cheap RuneScape gold, the experience, or the thrill of completing a difficult puzzle, Hard Clue Scrolls provide some of the most intense and memorable moments in the game.

          For players who enjoy the unpredictable nature of these treasure trails, the story of Kriil’s Hard Clue Scroll will go down as one of the most insane and epic tales in the history of OSRS.